How to Secure Your Website
- Cyber Security
- Cloudflare setup, CSRF protection, cybersecurity checklist, free website security, html site protection, HTTPS, malware removal, secure configuration, secure hosting, shopify security, SQL injection fix, SSL, WAF, web hardening, website protection, website security, wordpress security, XSS prevention
- October 23, 2025
How to Secure Your Website
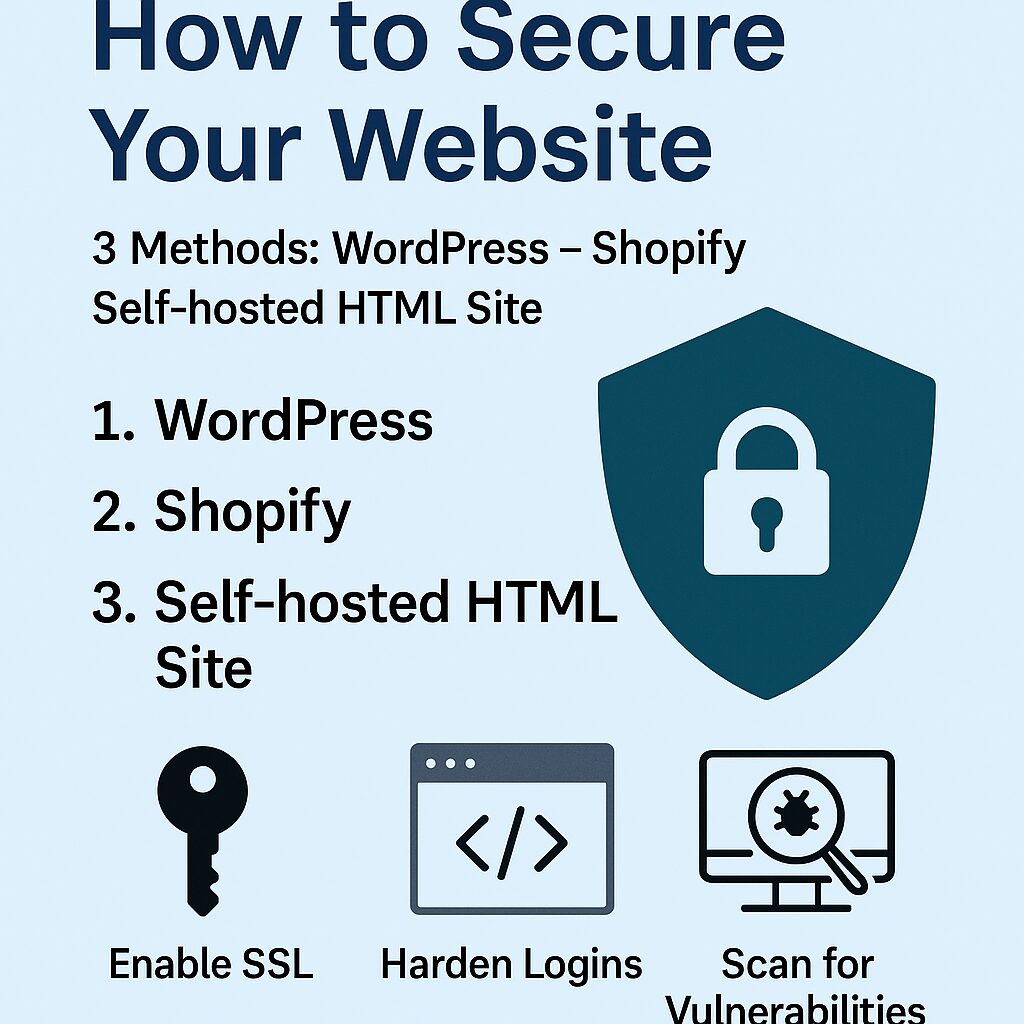
Three Methods: WordPress – Shopify – Self-hosted HTML site ( Top 25 list )
Securing your website doesn’t have to cost a dime — it just requires the right steps and consistency. Whether you’re running a WordPress blog, a Shopify storefront, or a self-hosted HTML site, there are free, proven methods to defend against hackers, data leaks, and performance-killing attacks. Most website compromises come from simple oversights: outdated plugins, weak passwords, or misconfigured settings. The good news? You can fix those with free tools and a few minutes of your time.
In this guide, we break down 25 no-cost security steps tailored to three common platforms: WordPress, Shopify, and self-hosted HTML sites. Each action includes exactly how to implement it — from enabling SSL and hardening logins to blocking brute-force bots and scanning for vulnerabilities. You don’t need to be a developer to follow along; everything here uses built-in options, trusted plugins, or free cloud services.
By the end, you’ll have a complete, repeatable checklist that locks down every corner of your website — protecting your visitors, your data, and your reputation. These steps are designed to meet modern security standards, close the top Common Weakness Enumerations (CWEs), and keep your online presence strong without spending a cent.
How to Secure Your Website
1) Inventory everything (sites, themes/apps, users, endpoints)
WordPress (free)
-
In each WP admin: Tools → Site Health → Info → copy details.
-
Plugins list: Plugins → Installed Plugins → click Screen Options (top-right) → set Number of items per page high → Export via browser “Print to PDF”.
-
Users: Users → All Users → export with free plugin “Export User Data” (free) or run SQL (phpMyAdmin):
-
Themes: Appearance → Themes → screenshot active theme + version.
Shopify (free)
-
Settings → Apps and sales channels → list apps; click each to note scopes.
-
Settings → Users and permissions → export list (copy/paste to your sheet).
-
Online Store → Themes → note live theme + published version (click “…” → “Edit code” shows theme name).
Static HTML (non-CMS) (free)
-
Create a simple inventory.csv at your repo root with columns:
-
If using Git:
Verify: keep a single Google Sheet or local CSV with tabs: Sites, Users, Components, Endpoints.
2) Backups & restore (test it)
WordPress (free)
-
Database (phpMyAdmin): select DB → Export → Quick → SQL → download.
-
Files (cPanel/SSH):
-
Free plugin option: UpdraftPlus (free) → Settings: pick local storage; schedule Daily DB, Weekly Files. Click Backup Now.
-
Test restore on a local Docker:
Import SQL into
wpdb, copywp-contentinto container/var/www/html/wp-content, updatesiteurl/homeinwp_options.
Shopify (free)
-
Products/Customers/Orders: Products → Export, Customers → Export, Orders → Export (CSV).
-
Theme: Online Store → Themes → … → Download theme file (emails ZIP).
-
Pages/Blog: copy/paste to Markdown (free) or use “Export Blog Posts to CSV” (many have free tiers—if not, copy/paste).
Static HTML (free)
-
Git snapshot:
-
Tarball:
-
Test restore locally by untarring and serving:
Verify: restore a backup to a throwaway subdomain or local VM and load the site.
3) Put a free WAF/CDN in front (Cloudflare Free)
WordPress (free)
-
Create a Cloudflare account → add your domain → let it scan DNS → change nameservers at registrar.
-
Security → WAF → Managed rules → enable OWASP rules (free).
-
Rate Limiting rules (free) (e.g., protect
/wp-login.php):-
Create rule: URL contains
/wp-login.php, action Block after 10 requests / 1 min.
-
-
Bots: Security → Bots → set Definitely automated to Block (free tier has basics).
Shopify (free)
-
Shopify already runs behind their own edge. Add Cloudflare DNS only (gray cloud) if you just want DNS features (no proxy). If you want WAF-like behavior, use Cloudflare proxy (orange cloud) only if your plan/storefront supports custom proxying without breaking Shopify’s SSL (often not recommended). Safer free option: use Shopify’s built-in bot protection (Settings → Domains typically managed; avoid external WAF unless you know the implications).
-
You can add Cloudflare Turnstile (free) as a captcha alternative on custom forms via theme code (see Step 14 for CSRF/XSS form protections).
Static HTML (free)
-
Proxy through Cloudflare Free:
-
Orange-cloud your A/AAAA/CNAME.
-
WAF → Rules: block common exploit paths (
/phpmyadmin,/wp-login.php,/xmlrpc.php) not used by you. -
Rate Limit any POST endpoints you expose (contact forms, etc.).
-
Verify: run
Check for cf-ray header and that site loads normally.
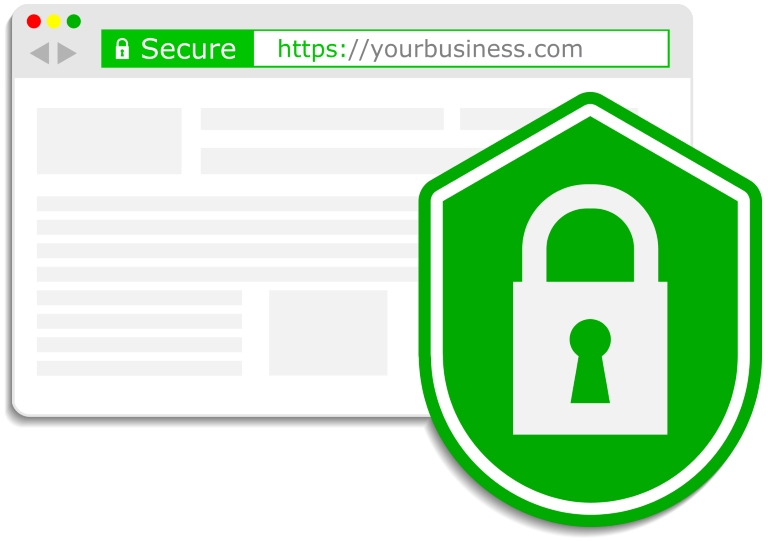
4) Enforce HTTPS + HSTS (redirect HTTP→HTTPS, secure cookies)
WordPress (free)
-
In Settings → General set WordPress Address & Site Address to
https://… -
Force HTTPS via .htaccess (Apache):
-
Nginx (if applicable):
Shopify (free)
-
Settings → Domains → ensure SSL is active (auto).
-
HSTS is handled by Shopify. For extra response headers on theme assets, use theme.liquid to set meta equivalents for CSP/XFO where possible (see Step 12 for CSP). True server headers aren’t fully editable on free Shopify.
Static HTML (free)
-
Use Let’s Encrypt (certbot):
-
Apply the same headers as in the WP .htaccess/Nginx examples.
Verify:
5) Least-Privilege users, roles, keys (no admin sprawl)
WordPress (free)
-
Users → All Users: downgrade anyone not needing Administrator to Editor/Author/Contributor.
-
Delete unused users (check “Attribute all content to” a valid user).
-
If you expose SFTP/SSH/DB: create per-site system users; avoid sharing root.
-
Deny file edits in admin (prevents code injection via editor). In
wp-config.php: -
File perms (on Linux):
Shopify (free)
-
Settings → Users and permissions: grant staff minimal scopes (no full admin unless required).
-
Revoke old collaborator/staff accounts.
-
Apps: review requested access scopes → remove apps that ask for broad scopes you don’t need.
Static HTML (free)
-
Deploy with a non-root OS user; set strict perms:
-
If using API keys in JS—don’t. Proxy server-side or use environment variables on the server; never hard-code secrets.
Verify: export current users/permissions to your sheet, check quarterly.
Related Posts


Leave Your Comment Here
You must be logged in to post a comment.
