How I Secured My WordPress Blog – A Real-World Cybersecurity Walkthrough
- Cyber Security
- blog hardening, cybersecurity, ethical hacking, free security tools, kali linux, secure blog setup, website security, website vulnerability, Wordfence, WordPress
- July 31, 2025
How I Secured My WordPress Blog – A Real-World Cybersecurity Walkthrough
This post documents how I secured my WordPress blog using free tools, plugins, and configuration changes. The process simulates real-world website hardening and vulnerability management, which is useful for anyone studying cybersecurity, running a blog, or wanting to understand how attackers target insecure setups.
Scan Your Site for Vulnerabilities
Step 1: Scan Your Site for Vulnerabilities (Recon Phase)Before making changes, I scanned my site using a variety of free tools:
🔍 Online Scanners:
🔗 WPScan Scanner (by Automattic)
🔗 Sucuri SiteCheck
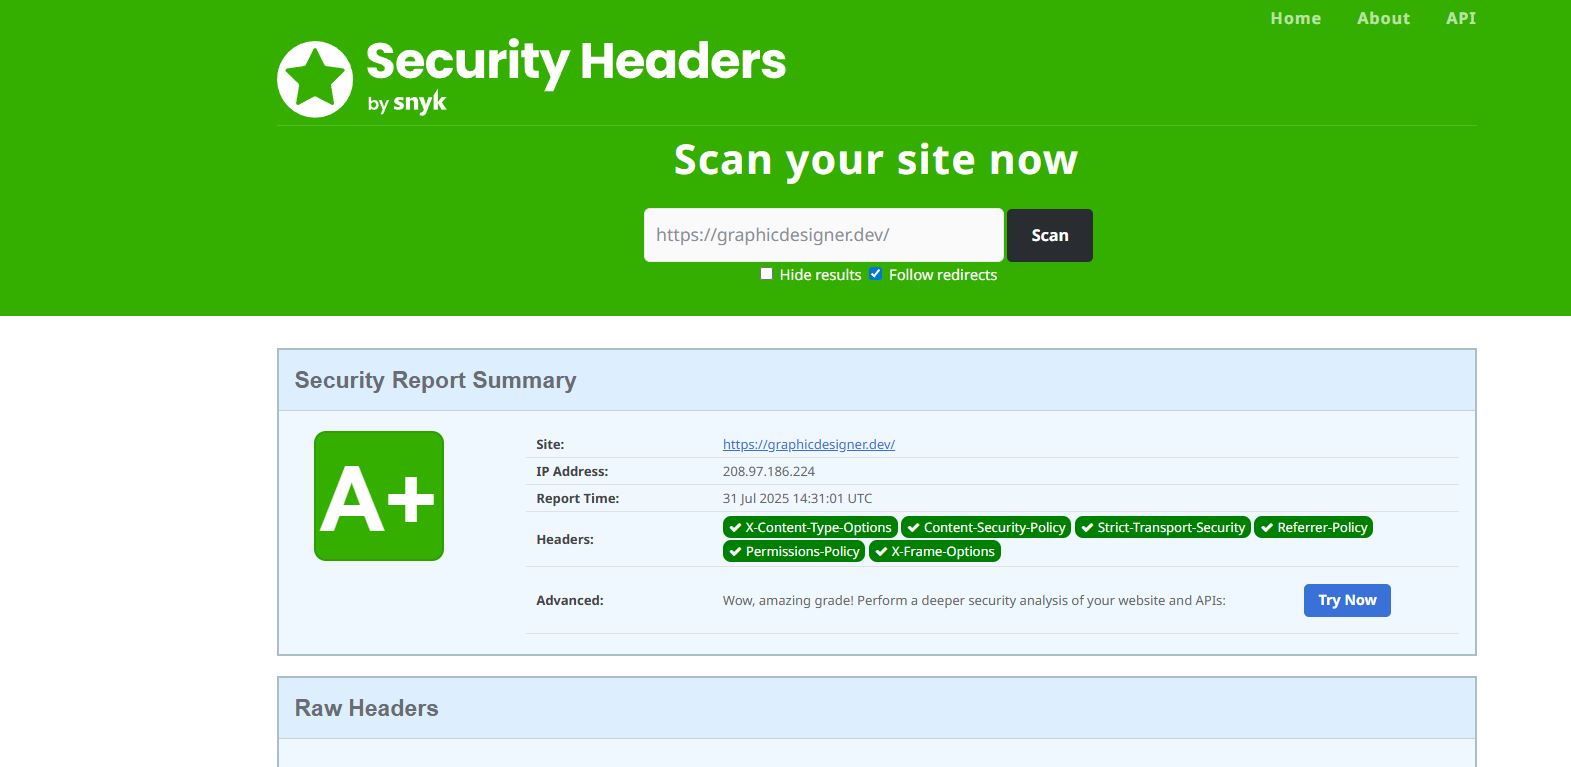
🔗 SecurityHeaders.com
🔗 Mozilla Observatory
🔍 Manual Recon / OSINT Tools:
Installed Kali Linux (penetration testing OS)
Used Nikto – 🔗 GitHub
Used WPScan CLI Tool – 🔗 GitHub
Used Burp Suite Community Edition for passive/active scanning – 🔗 PortSwigger
OWASP scanning Resources

Install Security Plugins
Step 2: Install Security Plugins (Free Versions)To automate protection and handle known exploits:
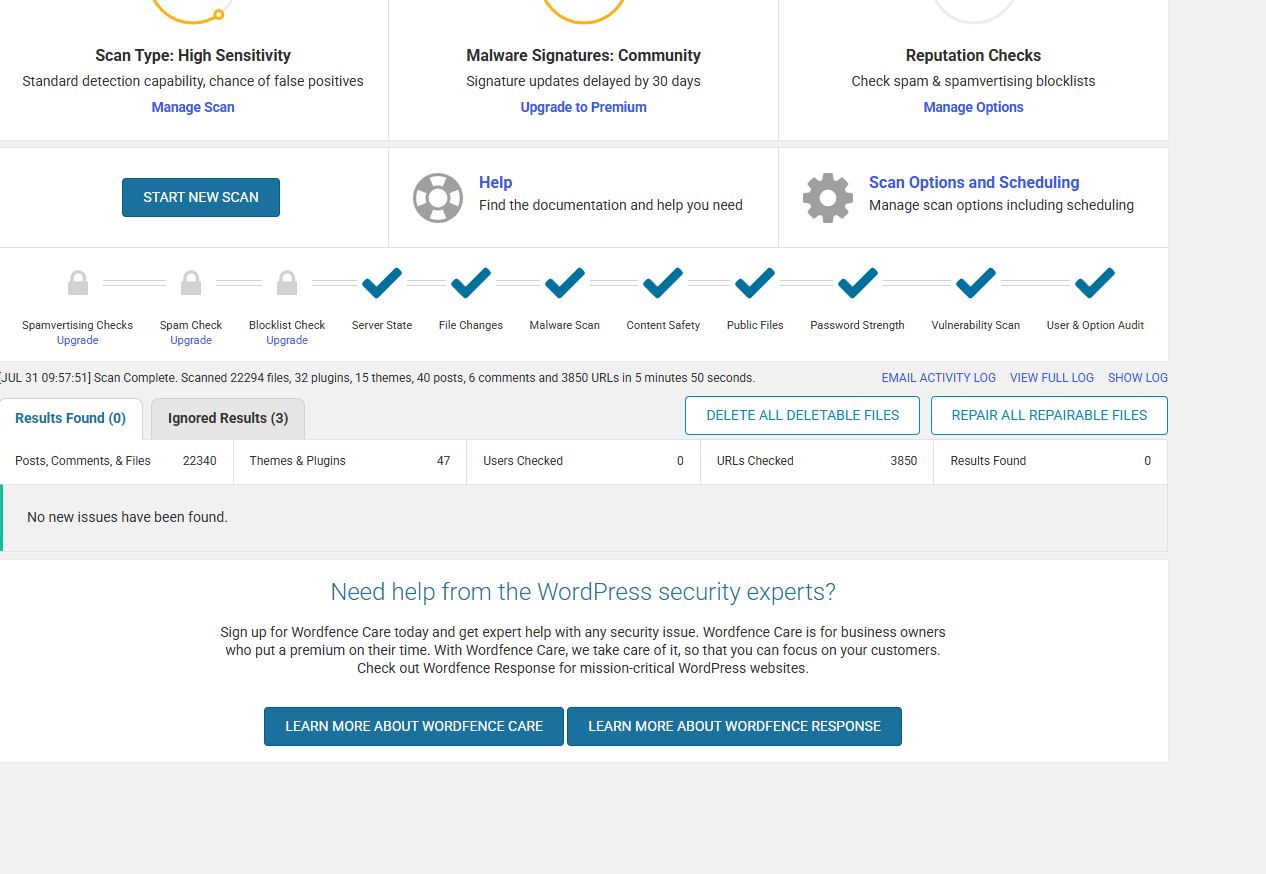
✅ Wordfence Security
Real-time scans
Malware detection
File integrity check
Dashboard results ✅ (screenshot posted)
✅ HTTP Headers Plugin
Used to apply security headers at the server level via .htaccess
✅ Really Simple SSL – Helps force HTTPS if SSL is enabled
Step 3: Set Up HTTP Security HeadersUsing the HTTP Headers plugin, I enabled the following headers:
| Header | Value | Reason |
|---|---|---|
| X-Frame-Options | DENY | Prevents Clickjacking |
| X-Content-Type-Options | nosniff | Prevents MIME sniffing |
| Strict-Transport-Security | max-age=31536000; includeSubDomains; preload | Forces HTTPS |
| Referrer-Policy | strict-origin | Limits referrer info |
| Content-Security-Policy | ‘self’ for scripts, styles, images, fonts | Reduces XSS risk |
| X-Download-Options | noopen | Stops auto-run in IE |
| Permissions-Policy | geolocation=() microphone=() camera=() | Disables unused APIs |
| Cookie security | HttpOnly | Secures session cookies |
| Cross-Origin Policies | Enabled | Prevents cross-origin leakage |
Step 4: Compression and Caching
Enabled GZIP/Brotli compression via .htaccess
Set Cache-Control and Expires headers for static files
Skipped Pragma and Age due to limited use with HTTP/2/3
Step 5: Skip MFA/Login Lockdown (for Simplicity)
Since the site is a basic info blog without user registration or sensitive login activity, I skipped adding login MFA, reCAPTCHA, or brute-force protection. These would make sense for an eCommerce or membership site.
Step 6: Validate the HardeningRe-ran scans:
✅ No malware detected (Wordfence)
✅ No open vulnerabilities (WPScan showed only 1 outdated plugin with known CVE: CVE-2021-24170)
✅ All major HTTP security headers applied

Young and pretty business woman working in office
Final Thoughts:
One of my favorite and most surprising free features of Wordfence is just how comprehensive the free version is. I was impressed that it gave me real-time monitoring, and I began to wonder whether the basic monitoring it offers could stand in for more advanced SOC tools.
➡️ At this point, I started researching available WordPress-compatible SOC analyst-style tools or plugins, like:
🔍 Activity Log – Tracks all backend user activity
🔐 WP Security Audit Log – Great for forensic tracking
📊 Simple History – Visual log of all admin changes
📡 Query Monitor – For debugging + performance inspection
These tools offer insights like change tracking, intrusion attempts, and detailed admin actions. For a SOC analyst in training, these are gold for learning SIEM basics in a real-world CMS.
Cybersecurity isn’t just about theory — doing real-world scans, fixing headers, removing outdated plugins, and checking results is the job. Whether you’re just running a blog or working toward a cybersecurity degree, this counts.
Tools Recap (Free):
🔧 Wordfence
🧩 HTTP Headers Plugin (not Insert Headers & Footers)
🧪 WPScan (CLI + Online)
🛡 Sucuri Scanner
💻 Kali Linux (Nikto, Burp Suite, WPScan)
🧱 Bonus: Secure .htaccess Template for Server-Level Protection
If you prefer not to use a plugin to manage headers or want more control, you can manually edit your .htaccess file to add the same protections at the server level.
Why this method is better:
🔒 Applies headers before WordPress loads (server-level protection)
⚡ Faster and lower overhead than PHP-based plugins
🛑 Harder to bypass by bad themes or rogue plugins
⚠️ Important: If you use this file, leave all plugin settings OFF to avoid conflicts
📥 Download .htaccess_Secure_Generic
Related Posts


Leave Your Comment Here
You must be logged in to post a comment.

